
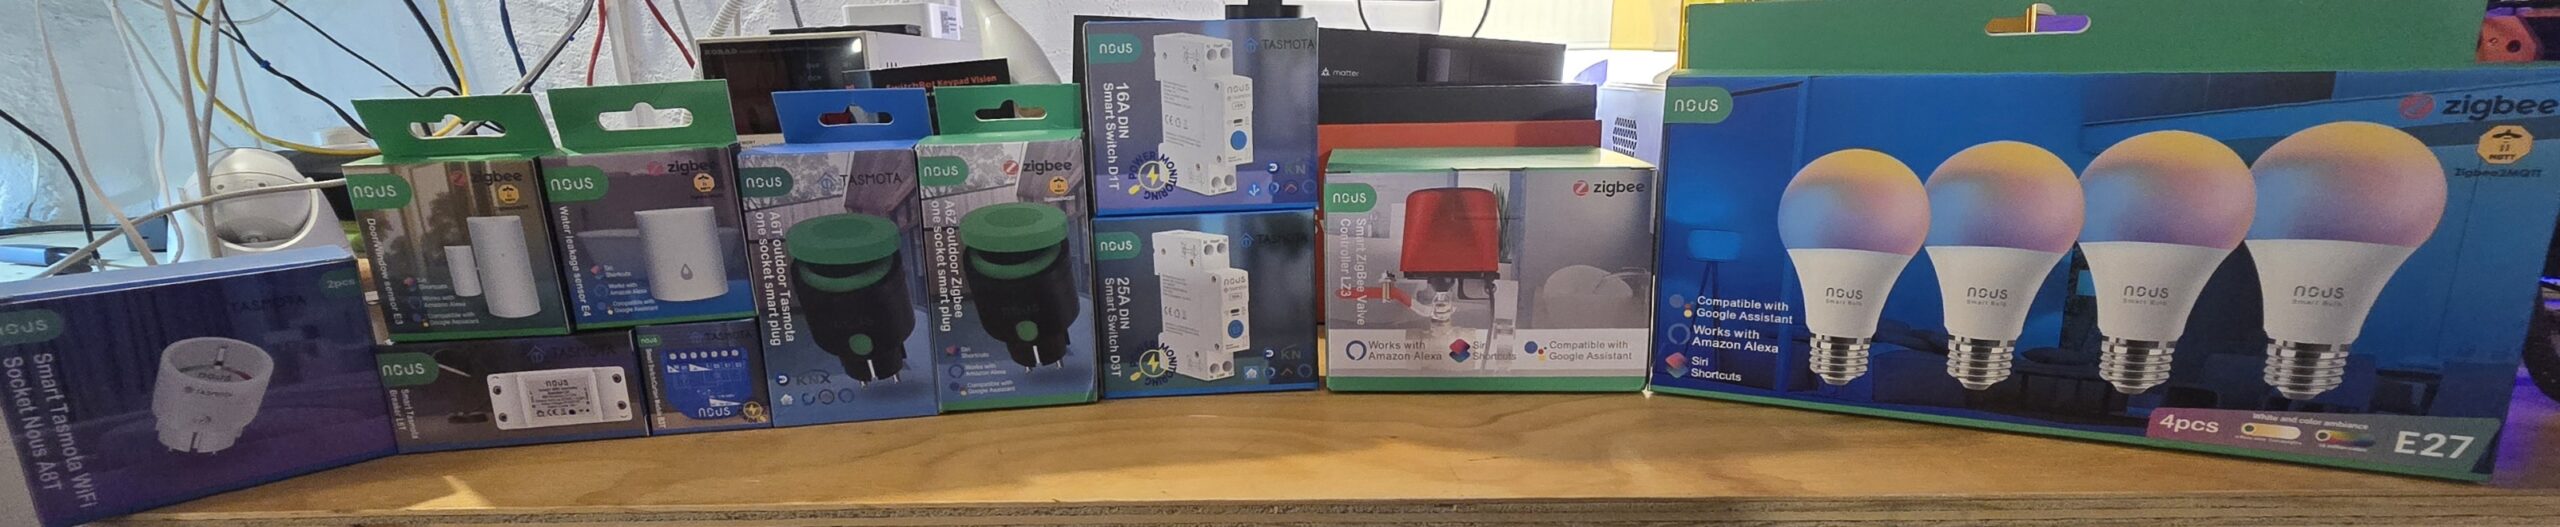
Until a couple of weeks ago, I’d never heard the name NOUS – but now I have, I’m glad I have. I enquired for samples to demo in here and they quicky send off several of their devices – great stuff, slightly marred by an incompetent courier here in Spain who dumped the goods at some arbitrary shop in the village, causing grief for both myself and Nous. I’ve suggested they avoid that particular courier in future.
Firstly – the Nous Zigbee 9w smart bulbs
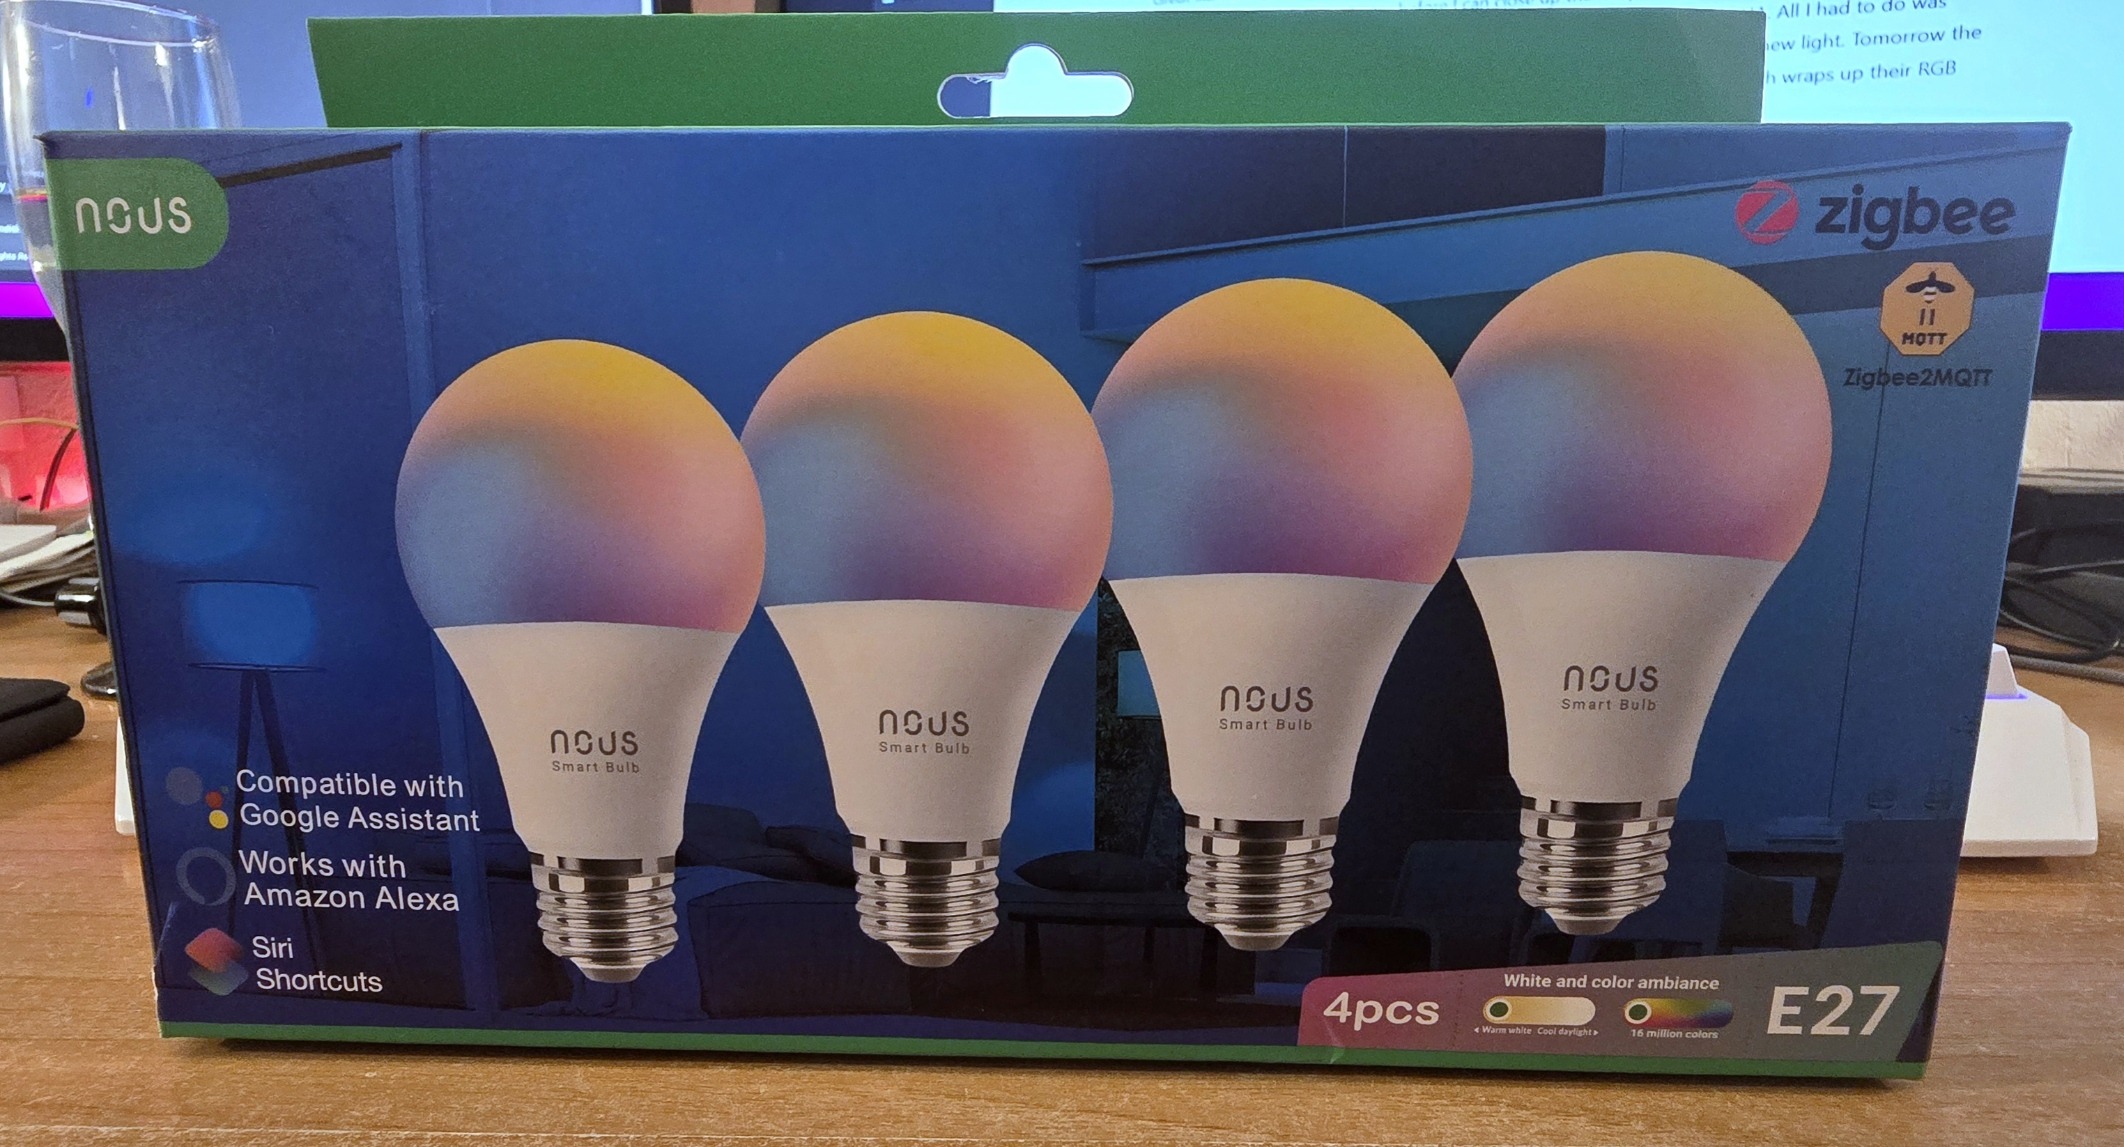
This evening I picked up the goods and over the weekend I’ll write something about them. Meanwhile, among other things, they sent me a 4-pack of Nous-brand 9W RGBCTT E27 bulbs (i.e. RGB + temperature-variable white) –product ID P3Z.
Timing could not have been better as I’ve just been updating Home Assistant and one of my office lights failed – something that doesn’t happen a lot. I tried everything including checking the WiFi access point to no avail. I recalled the now-defunct lamp is called COSTCO-2 – and on going back through the blog realised this is/was a FEIT RGBCTT E27 light bulb I blogged back in June 2020 and like others in my office, the light has been on most days all day since then – that’s 5 years – can’t complain.
The Costco light is one I immediately converted to Tasmota when I got it and thankfully I can check Tasmota lights independently of HA using TDM (Tasmota Device Manager). Definitely shot, not even putting up its’ own access point.
Ok, so deep dive into the new NOUS bulbs – these are Zigbee 3.0 – I pulled one out of the pack – plugged it in (the lights initaially flash for setup – nothing to do on the light itself) – set my Zigbee2MQTT to accept new devices and a new device with the usual long-winded numerical ID appeared. I ran the RENAME command in Zigbee2MQTT (which has a spiffy new interface in Home Assistant incidentally) and..
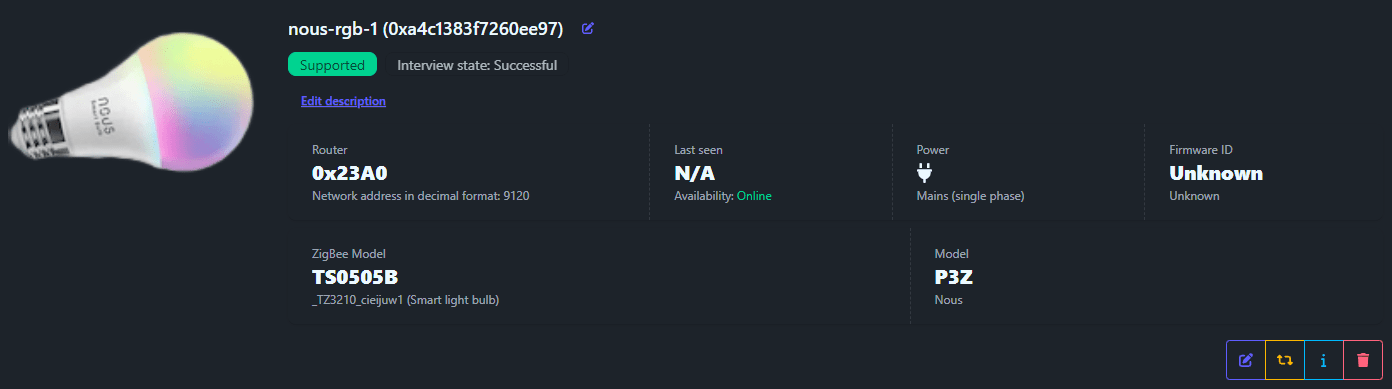
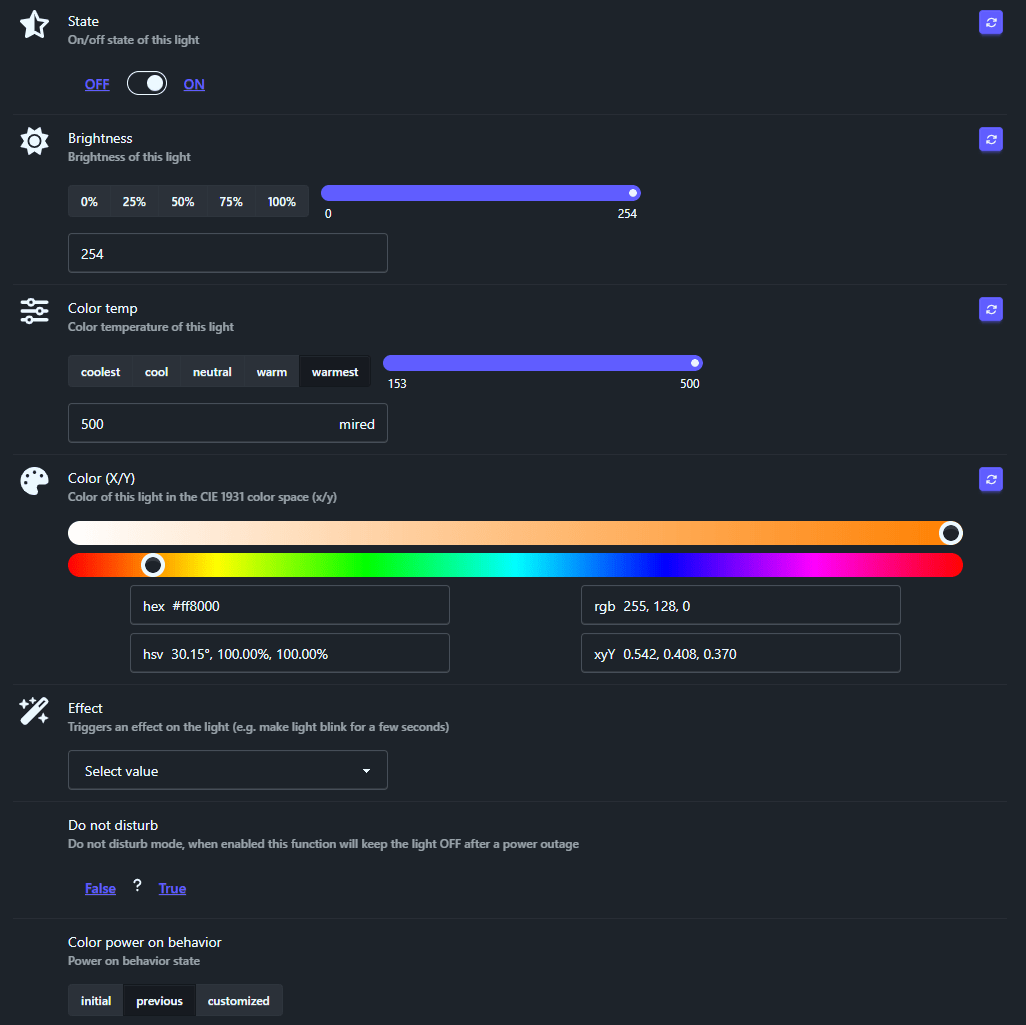
It turns out that Zigbee2MQTT knows all about NOUS and accepted the bulb immediately. Options include state, brightness, color temp, color, effect, do not disturb, color power behaviour (i.e. power on behaviour) – and well, that’s it – to be expected. I’m using “color” as that’s how they spell it – being British I’d normally call it “colour”. I set the light to full-on warm-white as well as “previous” for power-on behaviour.
Great start and got me out of a jam – absolutely no hassle. I named the lamp nous-rgb-1 and decided to call it a night after installing this lamp, as I need an adaptor before I can close up the lamp because the Costco light was UK Bayonet and the light fitting is E14 while this particular nous-rgb-1 device is E27 size.
All I had to do was change a lamp ID and an”office lights” helper group reference in HA – to point to the new light. Tomorrow the slightly trickier purchase of an E14 to E27 lamp adaptor. Actually that pretty much wraps up their RGB lights – they are of average brilliance for a (total) 9w lamp and it acually says on the box that they will work with Zigbee2MQTT (for the un-initiated, that’s completely local wireless – see the Zigbee2MQTT website for more). I should say the colour performance is better than many AliExpress-type RGB lights I’ve had, some or which have had adequate white but abysmal colour. These new lamps are just fine.
Next – the Nous Smart Tasmota WiFi Socket – Nous A8T
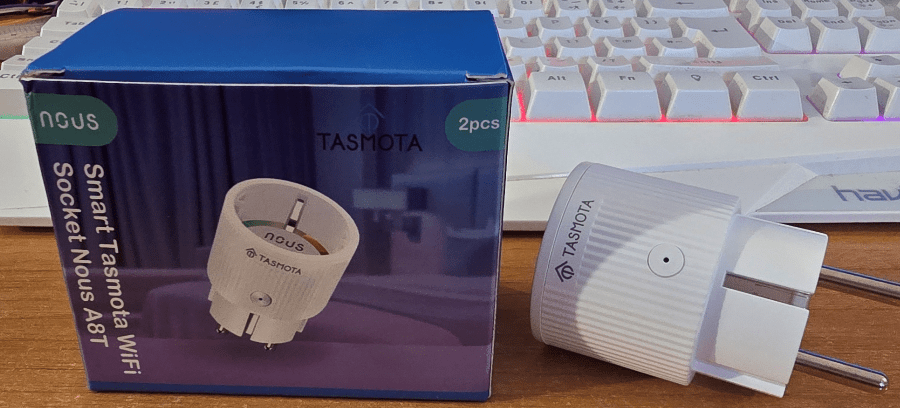
Being pre-fitted with Tasmota – setup for the A8T lamps could not be easier. I plugged in the socket to an extension and a nice blue light in the centre of the manual on-off side-button started to flash – exactly as I would expect from Tasmota. On my Android phone I went looking for a new access point with a name starting with tasmota – I found one and selected it.
I told it about my normal 2.4Ghz WiFi access point at which point seconds later I was told to reconnect to my normal Wifi and the device would be at address 192.168.1.147. It was.
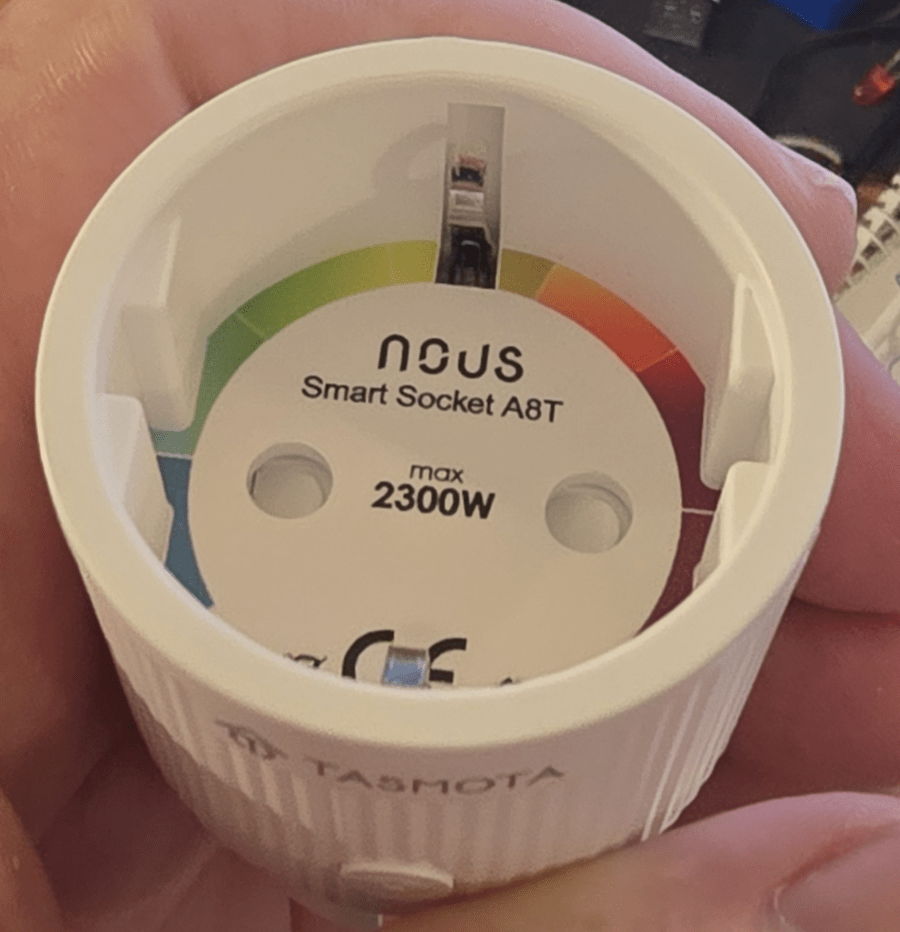
As you can see, right, the smartplug has a maximum capacity of 2300W (that’ll be non-inductive load) and as well as the Nous branding, shows Tasmota on the front.
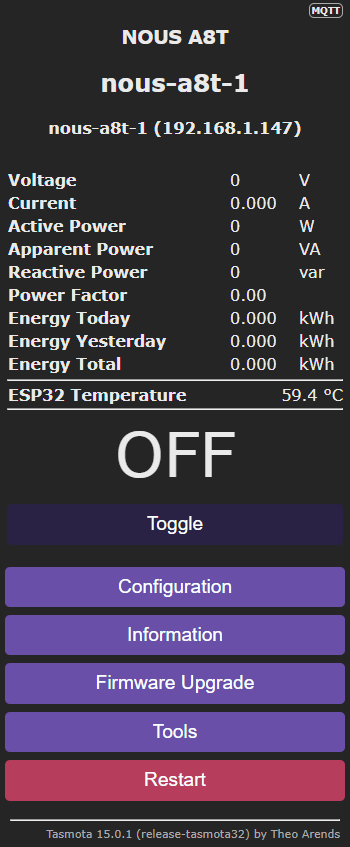
The very first thing I usually do at this point – is to change the name – I wanted this to be called nous-a8t-1
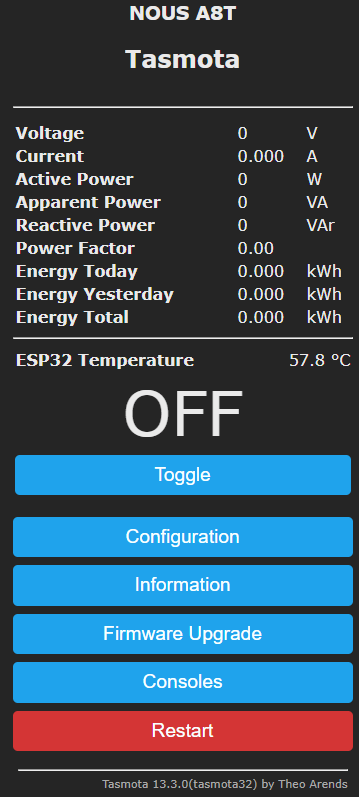
I could have continued setup on my phone but I chose to do it in a browser on the PC – just by entering that IP address. As you can immediately see, with no APP, just the built-in webUI in a browser (Chrome in my case), you have full control over the tasmota device – toggle on-off, configuration, information, firmware upgrade and consoles (plural). The latter tells you that this is ESP32-based.
The A8T does full power-monitoring and also shows the internal ESP32 temperature in the webUI. 58c is quite normal. See below.
So, without any setup, the device is just called Tasmota – you should name change before you proceed to setup/use any similar devices. The setup can be done in “configuration” but as I’ve done this many times, I’m going to go to “consoles” and the first submenu “console”.
In there I’ll enter everything in one long line… but of course you can go into configuration and set details individually – this is all covered on the Tasmota website and in numerous entries in my blog website.
I also use a setoption 53 – and set it to 1 so I can see the IP address in the webUI, but that’s just my preference. So the console command for that is simply so53 1
I also tell it about my MQTT broker and it’s username and password (not everyone uses an MQTT username and password) – and MQTT is not needed for these devices to work, though it helps for Home Assistant integration The important thing is to set the hostname under “configure WiFi” and again set the friendlyname under “configure other”
You can configure MATTER (I have no need for that as the socket will be used by Home Assistant and the MQTT configuration makes the device appear automatically therein). There is a TON of optional configuration.
backlog ssid1 myssid; password1 mypassword; mqtthost 192.168.1.20; mqttuser admin; mqttpassword mymqttpassword; topic nous-a8t1-1; hostname nous-a8t1-1; devicename nous-a8t1-1; friendlyname1 nous-a8t1-1; so53 1; timezone 99; status 5;
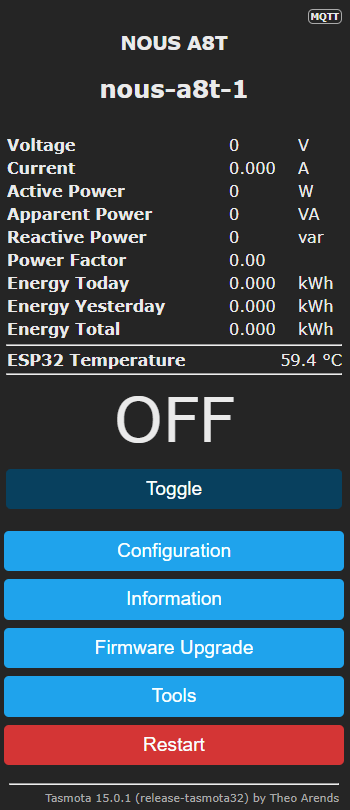
Note in the configuration page below right you are seeing the new name I’ve given the device – “nous-a8t-1” – I could have used something like “corner-shelf-light” but I prefer something that tells me that the device is rather than what it does.
Note that the power monitoring is pre-configured. My device came with Tasmota32 version 13.3 and I could not stop myself from using the built-in OTA firmware upgrade option and moments later without touching anything, I had bang-up-to date Tasmota running on my new smartplug. (see at the bottom of the config image right “”Tasmota 15.0.1”
You should be aware that Tasmota is totally open-source, fully local and very well supported by the autgor and the Tasmota community – and has been around for years. I developed my own firmware for ESP8266 devices years ago – it was good but ultimately moved to Tasmota because of the support it gets – and still gets in the ESP32 versions today.
It is absolutely un-necessary to upgrade the formware but I just like to be up to date.
It’s all down now to erliability and I can only say that the Nous A8T looks solidly built (and very pretty). To describe the possible features of a Tasmota-driven plug like this would take a LONG time but suffice it to say you have timers 7-day with repeat and sunrise-sunset and offset options – and if that isn’t enough you have a full set of powerful rules and more. In another article you;ll see me using a Tasmota smart plug as a router power-reset watchdog.
If you don’t like the standard colours in the webUI you can always go here – and to see the many, many commands you can use in Tasmota go here.
Of course you can ignore all of this and just use the A8T as a simple smartplug – but then you’d be missing out on so much.
Remember that because Tasmota runs locally, in order to access a Tasmota-based device’s webUI when away from home or the office, you’ll need to use a VPN. My VPN of choice is the free, easy to use and powerful Tailscale, running on my GL-iNet router. No installation needed on the smartplug.
So now I’ve told you about two Nous products – a Zigbee2MQTT-based lamp and a Tasmota-based smartplug – there is much more but I think I’ll split this blog up – I’ve lots of other devices that they sent to me – to show you – more over the weekend.
For now, I’m so glad I discovered this company – and no they are not paying me nor did I HAVE to create positive reviews. It just worked out that way.
Before stopping for now, I noted that Nous make some of their own products and brand others – if this interests you, their website no doubt provides detail.
Ok, just one more – this one is interesting – Smart breaker L6T
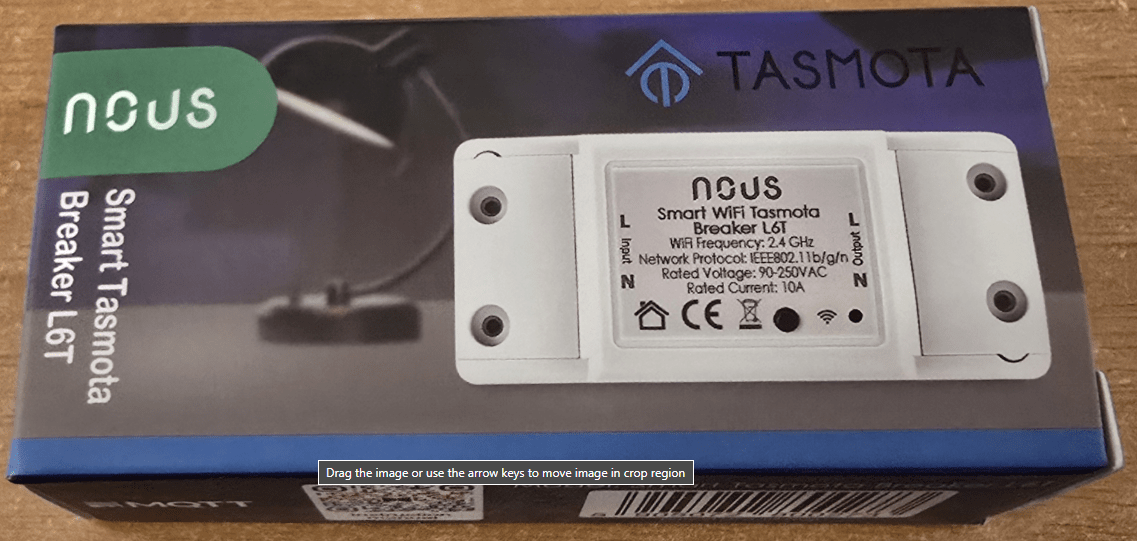
The little L6T Breaker looks REMARKABLY like the original Sonoff BASIC which you can hack to put in Tasmota (with links and using an FTDI – all a bit messy for beginners) and there are several AliExpress Tuya devices which can also be hacked and look the same but their links are even more painful. Here you have it all done for you at the least.
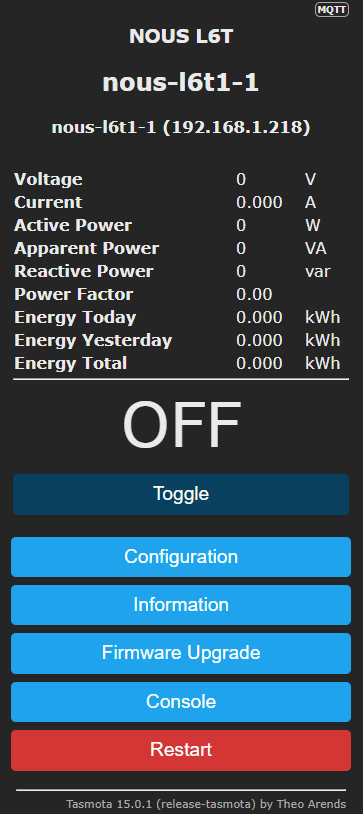
Ok so mains power applied, pretty blue light flashing. Exactly as the last device – access point on my phone – select my 2.4Ghz WiFi – then go to 192.168.4.1 on the phone browser – in this case the device has connected to 192.168.1.218 on my network and of course the blue light is no longer flashing.
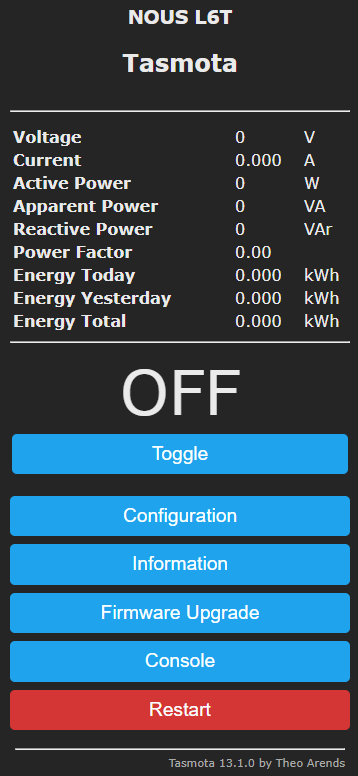
And there it is… OOOh, power monitoring.. so it’s NOT your average Sonoff BASIC. “Information” says it’s running an ESP8266EX with 2MB of FLASH. Not checked which power monitoring chip yet but it is all pre-calibrated so you don;t have to concern yourself with the detail.
And once again I cannot stop myself from going for the upgrade…. “Firmware upgrade”. As with the previous device, the OTA URL is already set up so all you have to do is select the first “start upgrade” button and wait a while.
Well, not QUITE but almost that simple. Tasmota automaticawlly goes off and gets the minimal version and installs and says “this might take a minute” as it goes off for the full upgrade.
I guess in some browsers this update shows up automatically after a couple of minutes max but that’s never worked for me so I just wait for 4-5 minutes then hit the browser REFRESH at which point I always see the fully updated Tasmota. Best not to be TOO impatient, better safe than sorry.
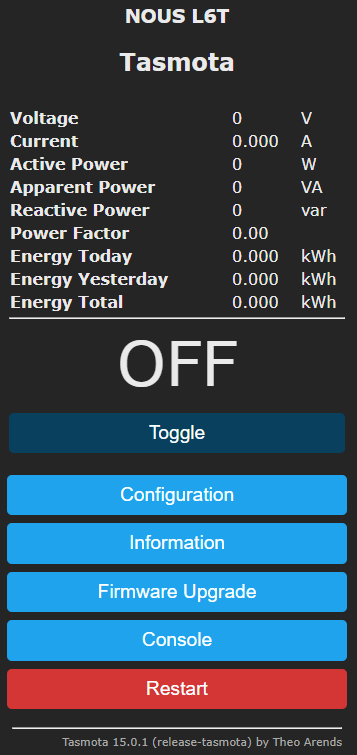
And there it is – version 15.0.1 fully updated Tasmota. See on the image on the right – the bottom line shows the Tasmota version.
There is very little difference between ESP8266 and ESP32 setup – just more options in the latter.
And now for the setup of name etc. and in my case MQTT setup. Again I include a command to show the IP address. I described this above so I’ll not repeat. Despite being a completely different device – setup is the same.
My little backlog line which goes into the console (only one console option in the case of ESP8266) works a treat.
It’s all down to price of course but again it seems that NOUS have done a great job – another local-only device with the easily updated Tasmota and don’t forget that there are easy and free ways to ensure remote access without using someone’s cloud. There is NO annoying mention of optional cloud in these products.
This product incidentally is your normal 10A relay job so think about maybe 7A maximum inductive (heater coil) load. That’s my personal guide, not a scientific fact.
I use such devices a LOT for reliably locally controlling anything except motors and large heating elements. My PC has such a device acting as a watchdog power controller. I use standard smartplugs where someone utterly non-technical may want to disconnect them but on my own kit I’m happy with inline controllers such as the L6T.
Now the blue light comes on solidly once the device is connected – and when you switch the relay on and off it flickers momentarily. Being Tasmota you could, if feeling brave, simply amend the template under configuration – other – but for now I’ll leave this be – at least until I get a second unit.
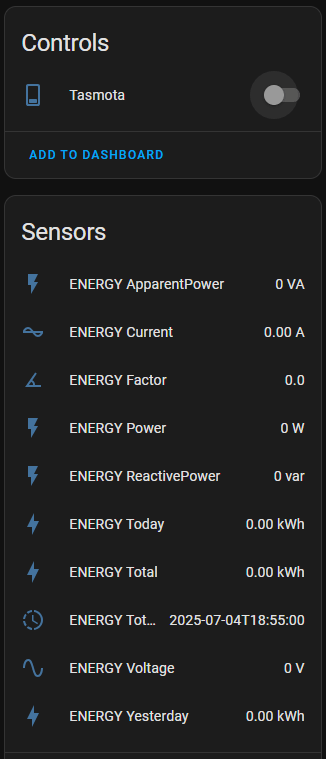
Being an ESP8266 there is no Bluetooth but I’ve rarely found that a problem. Below, the device magically appeared in Home Assistant and here’s what you get. And that’s about it for the L6T.
Nearly forgot – here the link to the Nous Website
Next on the list – the Nous D1T and D3T DIN Smart Switches
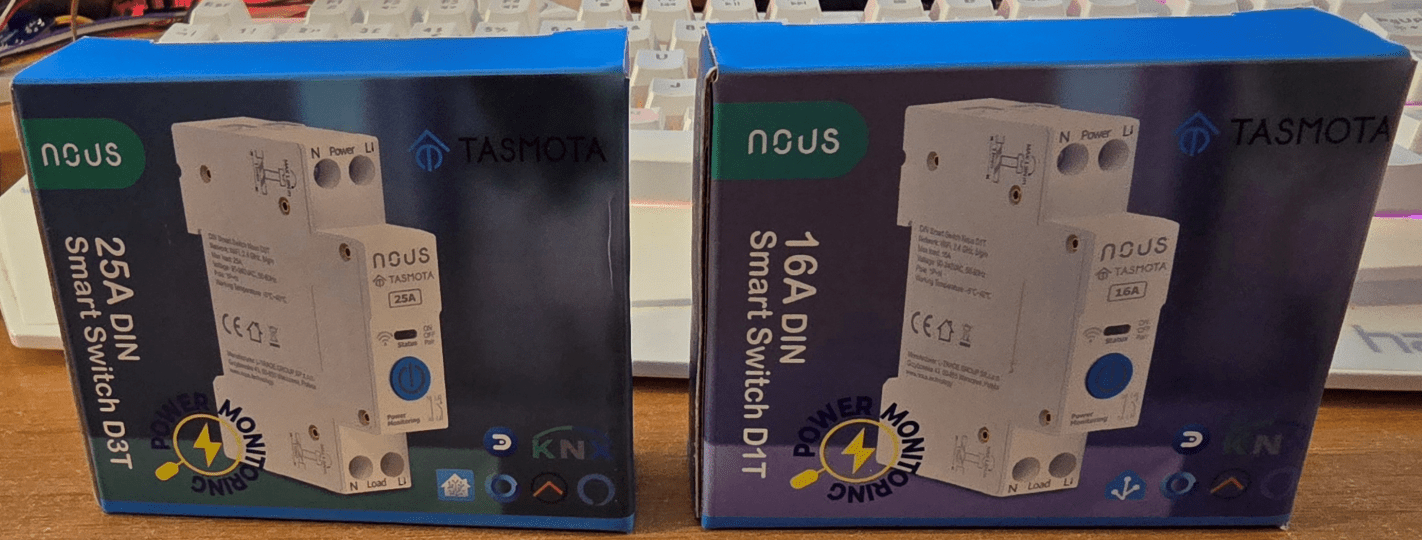
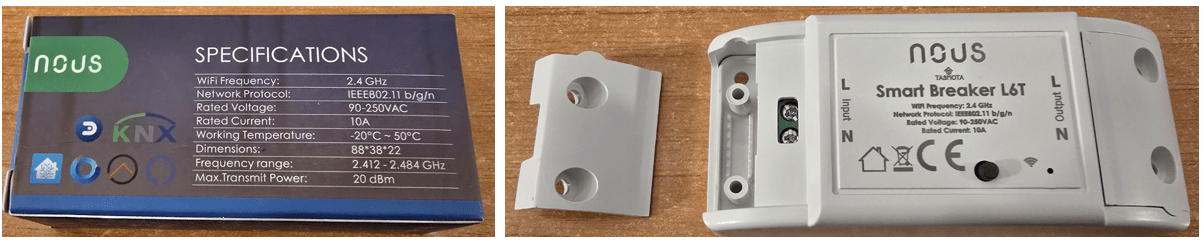
These two DIN-mount switches D1T and D3T LOOK high quality like everything else I’ve seen up to now from Nous. Both the cases and the units also look the same – if you’ve seen one DIN-rail contactor you’ve seen them all – if not you should maybe avoid these because – as with the L6T, you will be connecting high voltage wires 🙂
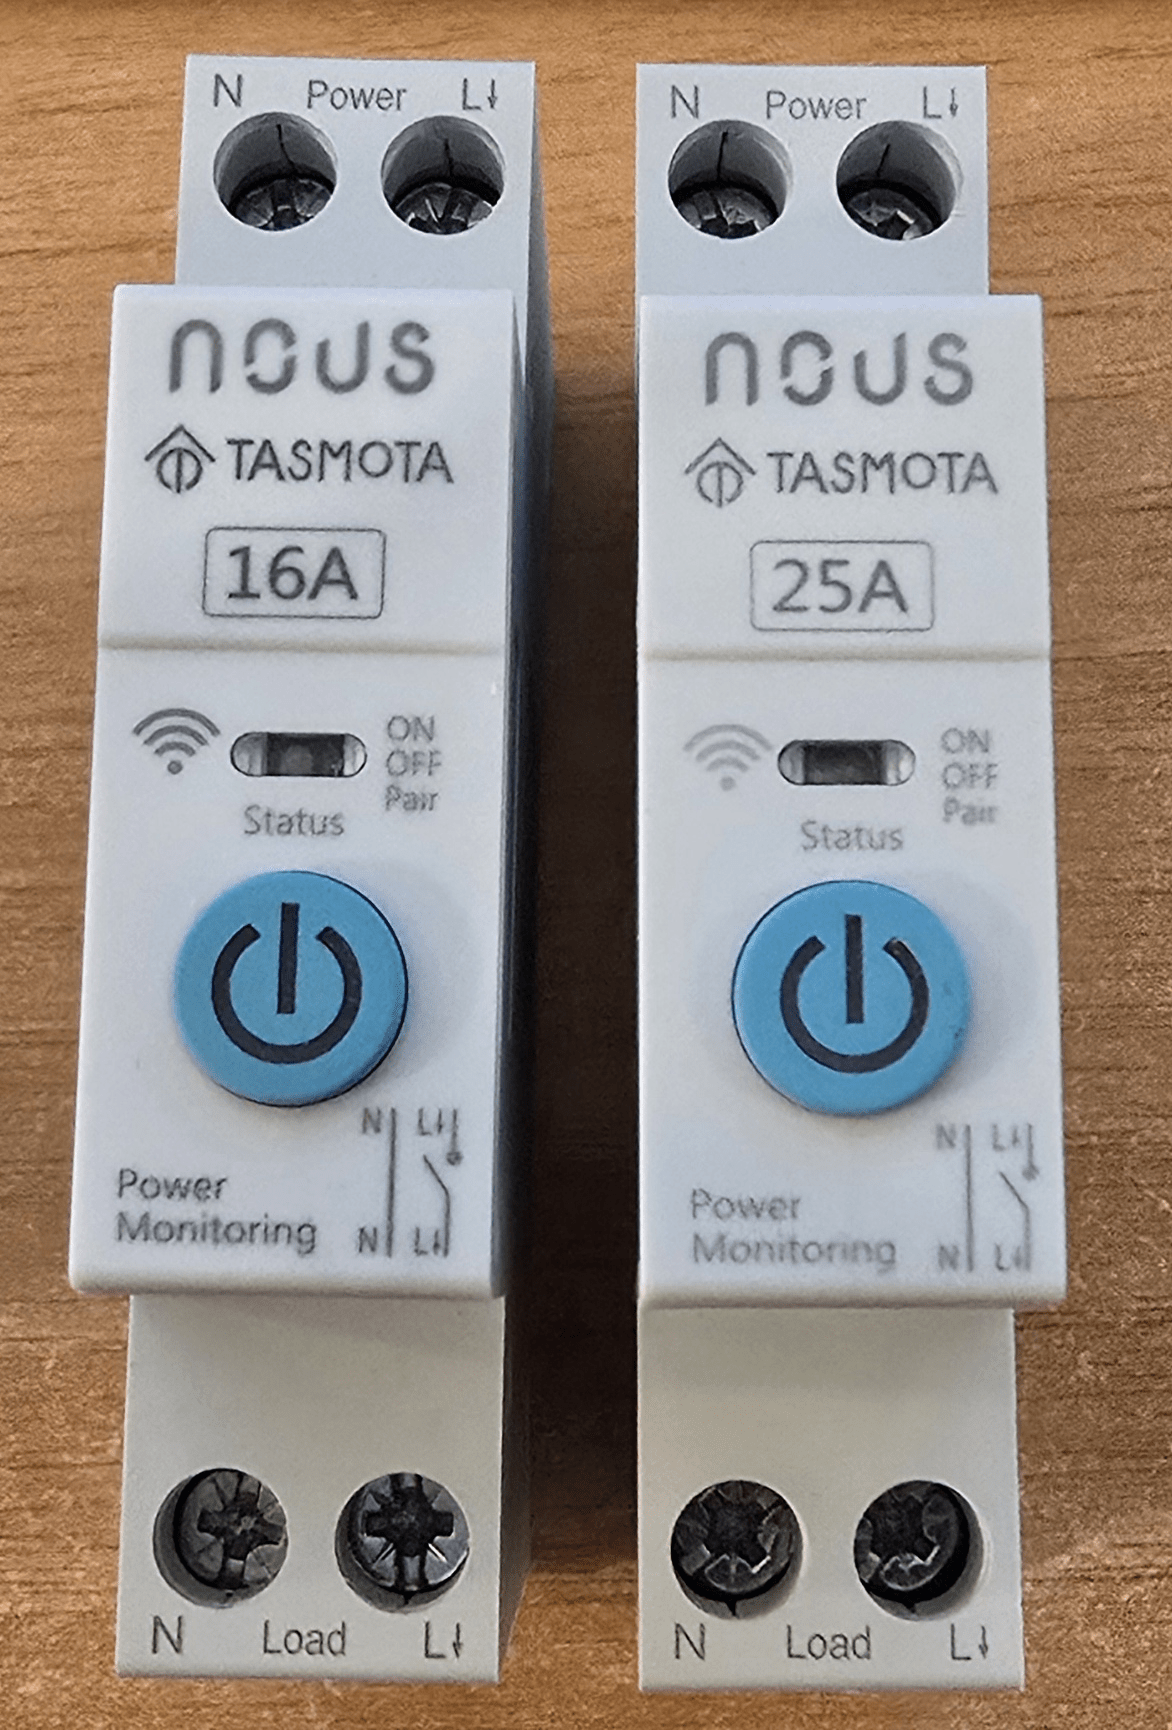
Important note – only the LIVE side is switched here the neutral top and bottom are permanently connected – so getting the wiring right is very important. So – mains power in the top.. load in the bottom. Plug in power and a blue light starts to flash.
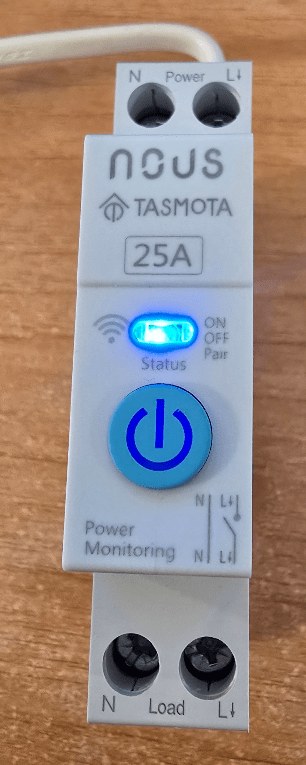
Note that the blue light doubles up as a pairing light and an output on/off state indicator.
Being Tasmota, setup is identical to the Tasmota devices shown above. Well, maybe. With the unit on and the blue light flashing, it SHOULD have created an access point beginning with Tasmota which I could use on my phone to start the ball rolling – but it didn’t.
So starting with the power disconnected, I connected and disconnected 6 times, leaving the device connected on the 7th time (maybe someone had been testing this device and forgot to factory reset it). NOW I had the flashing light AND an access point starting with tasmota.
I connected my phone to that access point – accepted that Internet may not be available” as usual and sent my phone browser to 192.168.4.1
Within a few seconds the usual Tasmota web page popped up and I entered my nearest 2.4Ghz ssid and password.
A few seconds later the device showed it’s new address on my network – 192.168.1.199 – it also showed “Analog Temperature” 41.5c (not “ESP32 Temperature” as in the A8T above – weird). The temperature showed as 39.6c – Oh, the ESP32s in these two devices have 4MB of flash. I later discovered that the ESP23 temperatuer reading is fairly usless and is enabled with SO146 1 and disabled with SO146 0. I stilol waiting to find out what that analog reading is for.
When doing that backlog to set everything up – if the new devicename doesn’t show up after a restart 1, refresh your brower.
At this point I just HAD to go off and upgrade the firmware as described above. Especially as I was not happy with the indicator light – which when using the manual switch button for the first time turned red when on then blue when off – but stayed blue the next time. So, update from Tasmota 14.0.1 took a couple of minutes – to 15.0.1
And NOW, the button didn’t work AT ALL. This has never happened to me before. Good job I also had the 16A unit.
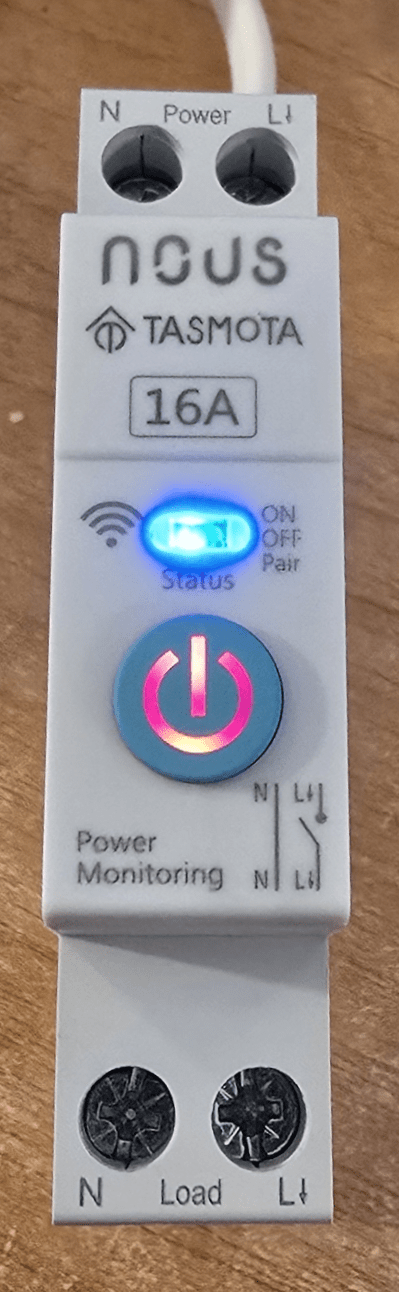
I connected up the 16A D1T unit as before and it appeared at 192.168.1.75 on my network. Configuration was Nous D1T (0). On pressing the real button the blue light flashed and the button turned RED with the output on. When I tried to update the firmware, no OTA URL
I went back to the nous-d3t-1 and checking under configuration-template – Activate the template option was unticked – I ticked it and one fully updated D3T and the right URL update link was available. So I went back to the D1T. Under Firmware update, I pasted the firmware update URL (generic ESP32 firmware, not Nous-specific) from the D3T into the empty box. The software updated to Tasmota 15.0.1 no problem but no template – so back to the configuration-other section – sure enough in THIS device “active template” was unticked – I ticked it and hit SAVE. All’s well.
I applied my console backlog as I did in other devices – all set up with useful naming and my MQTT info.
backlog ssid1 myssid; password1 mypassword; mqtthost 192.168.1.20; mqttuser admin; mqttpassword mymqttpassword; topic nous-d1t-1; hostname nous-d1t-1; devicename nous-d1t-1; friendlyname1 nous-d1t-1; so53 1; timezone 99; status 5;
I’ve dropped a line off to Nous – it is entirely possible some finger problems crept in here – but no matter – all’s well in the end.
With the Nous D1T currently connected to power, I thought I’d head off to Home Assistant to see what’s what. Both devices and all sensors magically appeared in Home Assistant.
.