
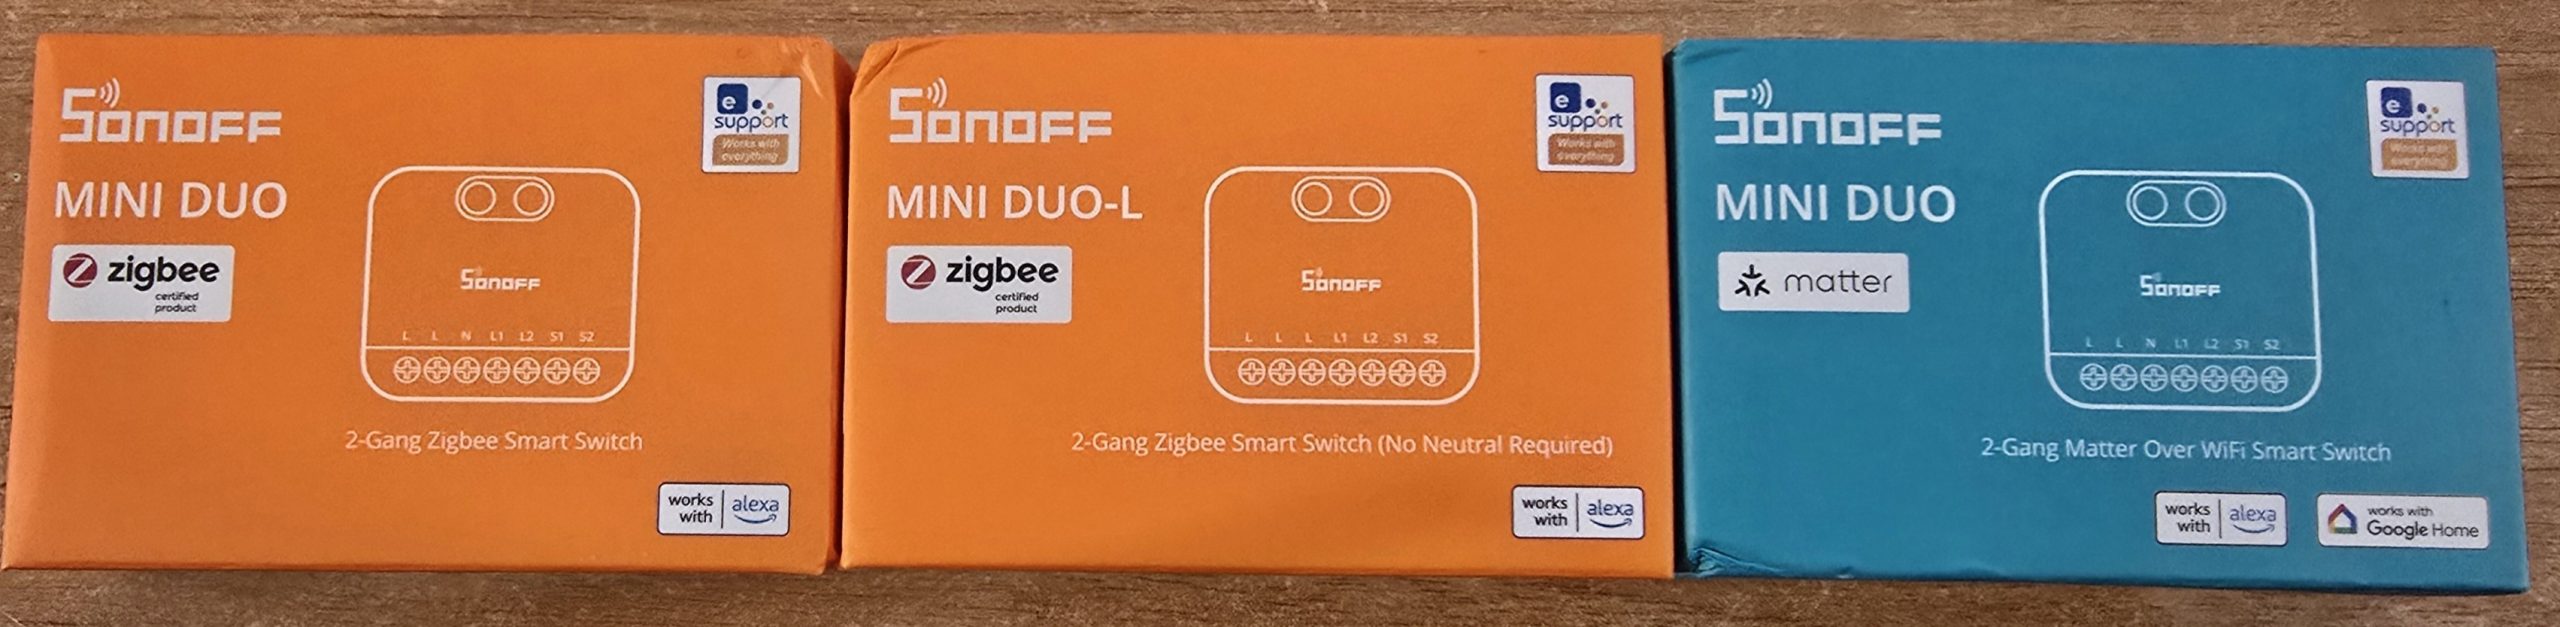
Sonoff continue to bring out well-priced new products – I just received the Mini Duo (Zigbee), Mini DUO-L (Zigbee) and Mini Duo (WiFi) – all of the above are part of the Sonoff Mini Extreme series.
Their products are starting to get quite consistent in size and design but with pretty new colours. So let’s start with the easiest one – the Mini Duo (Zigbee) – I’m going to jump straight into Zigbee2MQTT (you can of course use these with other platforms including the eWeLink APP but I’m a Zigbee2MQTT fanatic – I use this in 2 countries – all controlled by one Mini-PC here in Spain and using an SMLIGHT Zigbee “coordinator” in each country.
Before I get into this – as well as using the SMLight Ethernet-based coordinators – (the uninitiated might call it a router) and various Zigbee Smartplugs and lights as routers (the uninitiated may call them repeaters), I’ve only just realised thaat Sonoff’s own tiny ZBMICRO unit (USB in, switched USB out) can ALSO be used as a router – and it even has a signal boost feature..
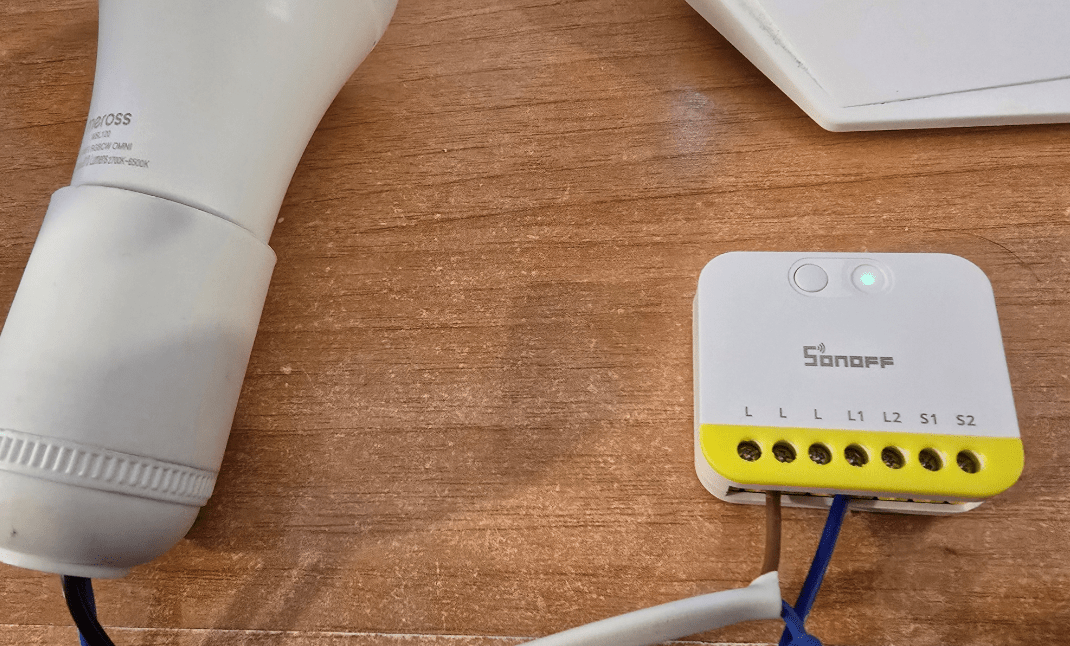
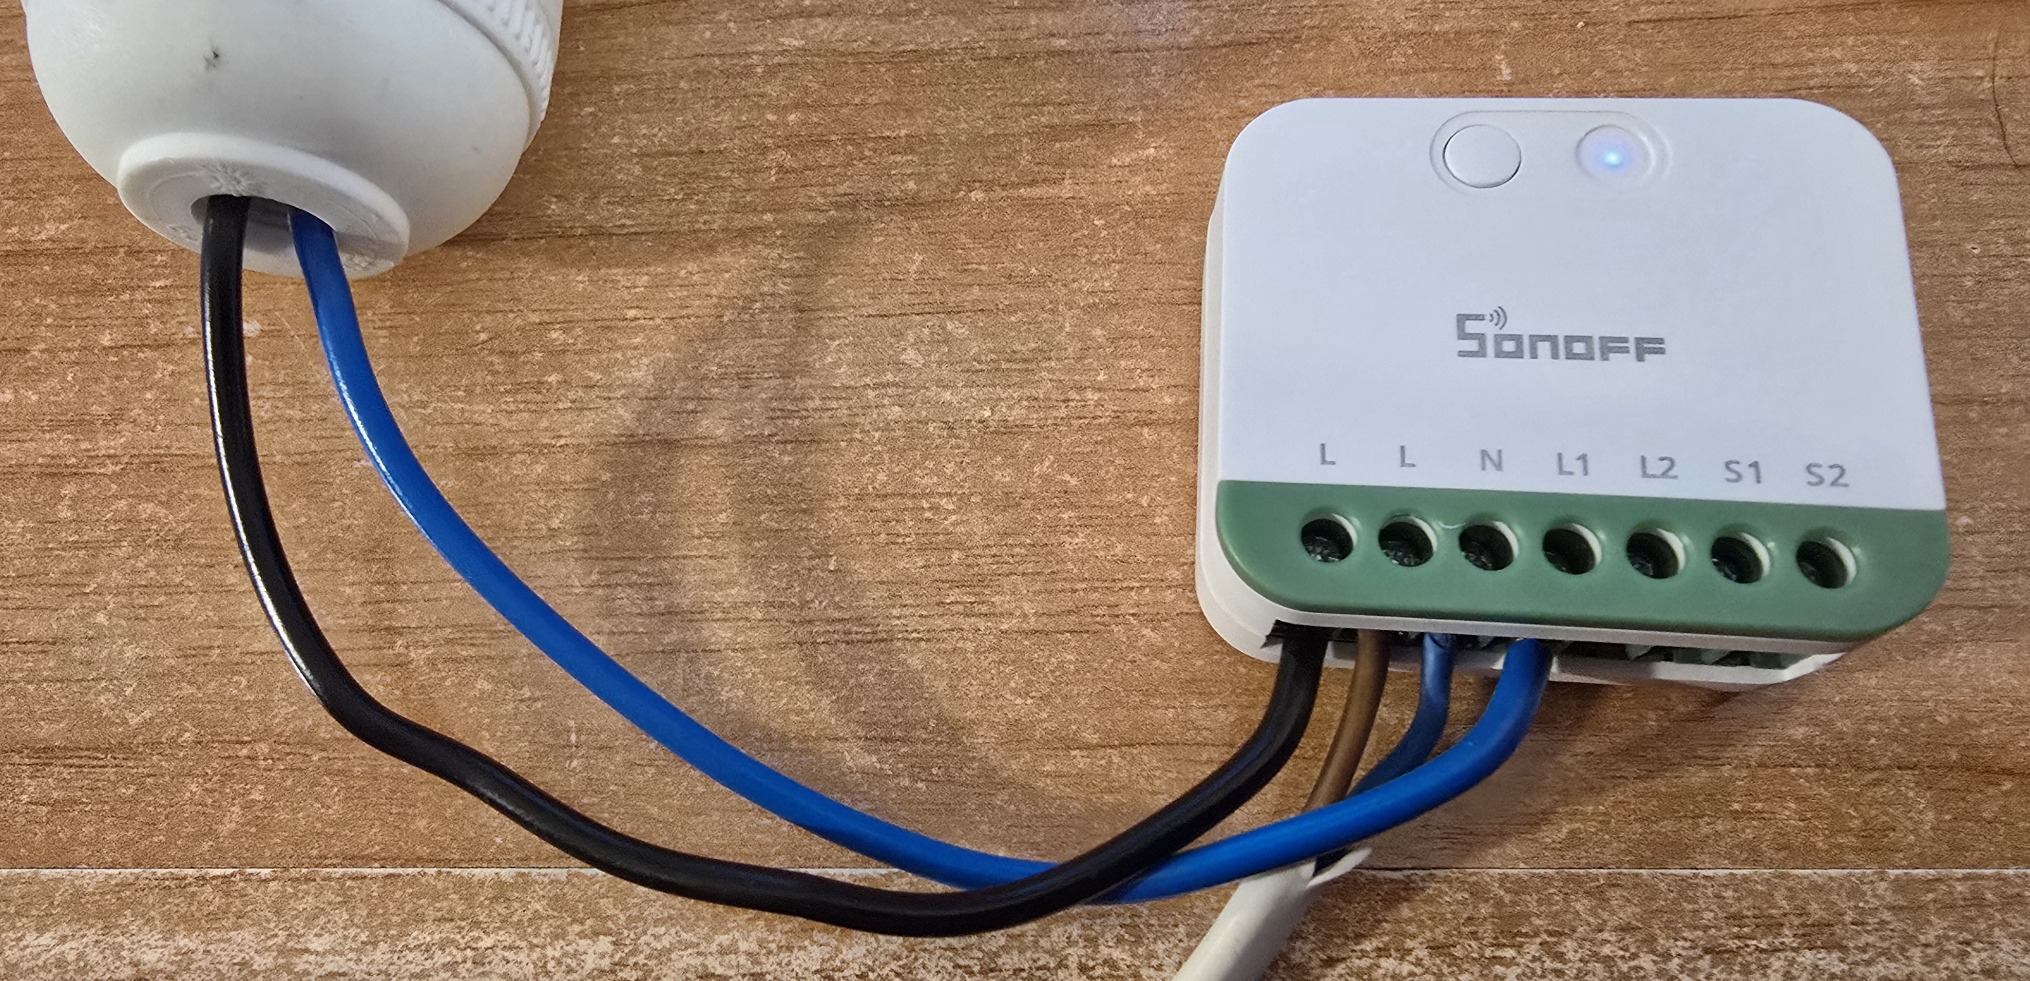
Ok, onto the Mini Duo. 46mm*40mm*18mm, not the smallest but quite small. I love the lime green panel. The pins should be obvious from the photo below.
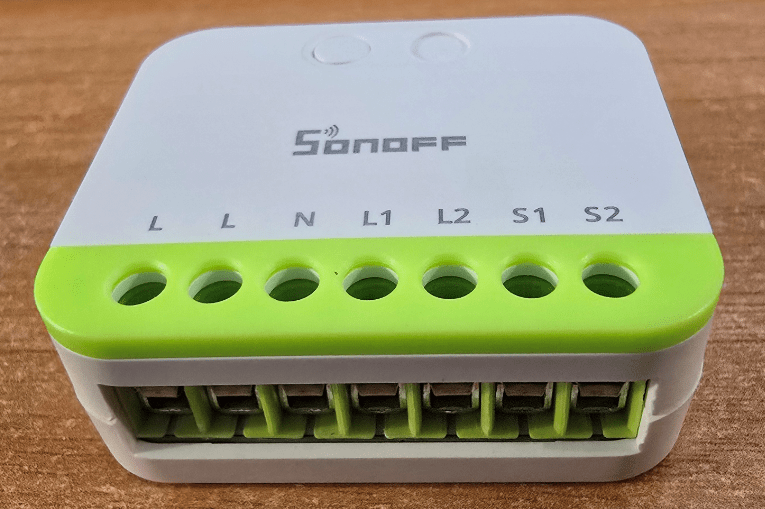
Straight in at the deep end – 220v power in (don’t even think of doing this if you’re a 220v newbee).
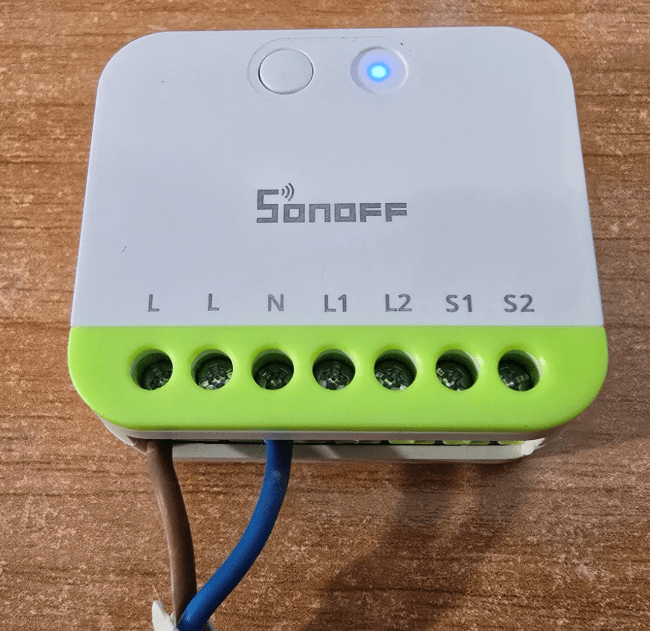
I applied power and the blue light started flashing. I went to my Zigbee2MQTT control panel and hit the PERMIT JOIN button. “MINI ZB2GS” found. As I only have the one for now, I gave it the friendly name of “sonoff-mini-zb2gss” – kind of says it all.
Again in Z2M, clocking on “device – exposes” suggests a fully supported zigbee dual switch. At this point I broke down and checked the box – 10A per output and a very honest 16A resistive load MAX.
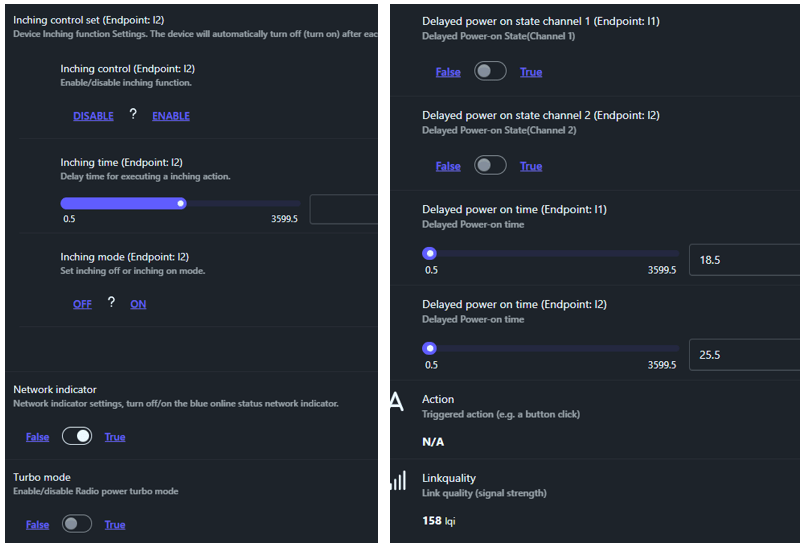
WELL, lets take a look at this lot below: 2 on-off controls, power-on behaviour for both individually, “inching” controls, “Turbo mode” as described above for the mini-USB device – they don’t seem to have left anything out of this Zigbee dual power switch.
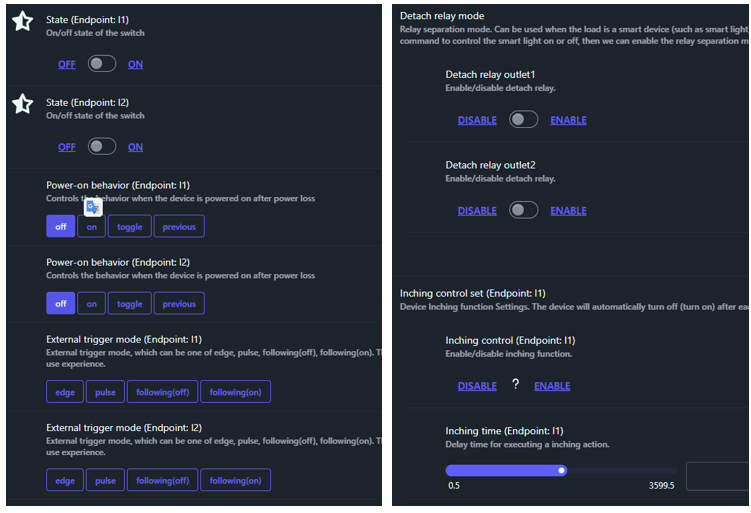
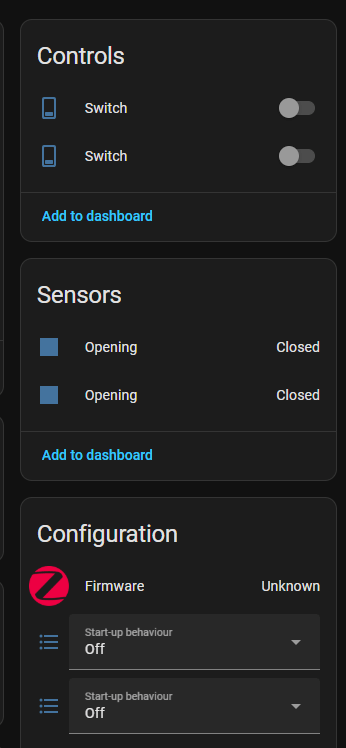
See controls above – the following is what I saw when I went into Home Assistant without configuring anything… pretty straight-forward.
A quick note – obvious, I know, but if fitting one of these into an electrical box – make sure it’s a non-metallic electrical box – as the Sonoff units don’t have an external antenna. Sonoff claim up to 100m range in the open – line of sight. And yes, neutral IS required. The manual switches (S1, S2) if you use them, return to LIVE while your LOADS on the outputs return to NEUTRAL.
The Mini-Duo-L looks to be about the same BUT the panel area above the connectors is yellow and the unit doesn’t need neutral – very important as many light switch sockets in the UK and here in at least rural Spain have no neutral available – mine certainly don’t. Also, maximum load of 8A per output for a total of 12A max (resistive load – nice to see manufacturers such as Sonoff are now making that clear) per device.
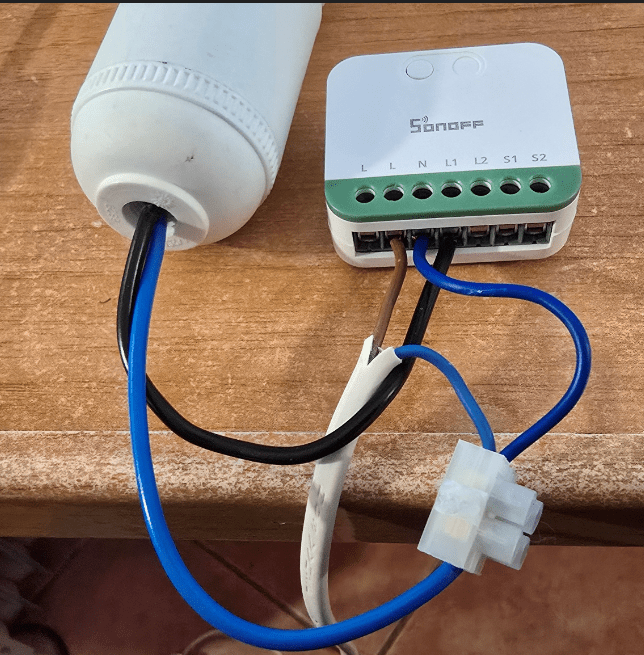
So this time around, there are 3 L connectors also L1, L2, S1 and S2. Use any old L block for mains power in, L1 (for example) to a lamp (load) and the other mains line also to the lamp (load). See image below.
This time there is a green flashing light rather than blue…. but the pairing operation is the same..
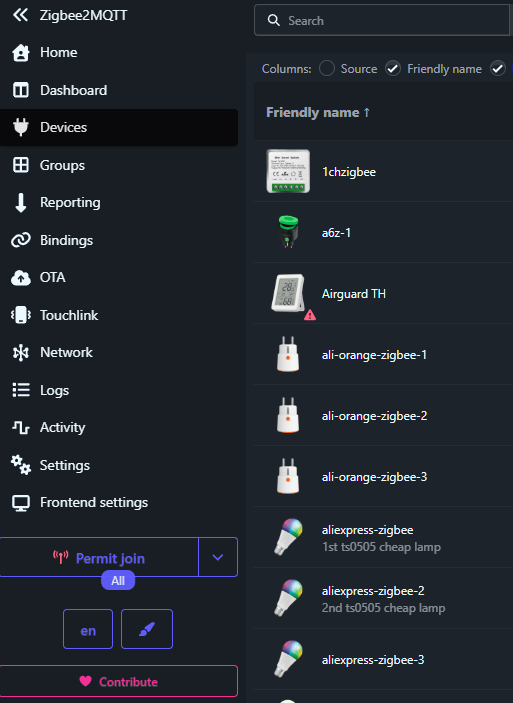
Once again I’m in the Zigbee2MQTT front panel under DEVICES and lower left you see PERMIT JOIN. The green light is continuing to flash as I write this so I simply hit that Permit Join button and seconds later a new device appears at the top of the list with a long number for a name.
Well, except that it didn’t. So I waited a minute during which that light continued to flash quickly, I held in the button on the Sonoff for several seconds and released – at which time the flashing continued, but somewhat slower!! So, I pressed the Permit Join button in Zigbee2MQTT again and the new device appeared – apparently natively supported.
See the image below with the typical Zigbee indecypherable hex address.

I then used the rename button on the Z2MQTT panel for the device and simply renamed it to mini-zb2gs as I only have the one. Ok, you could say “kitchen light” might be more appropriate but I find it handy to name devices in a way I can match the name with the device – especially when testing – my choice.
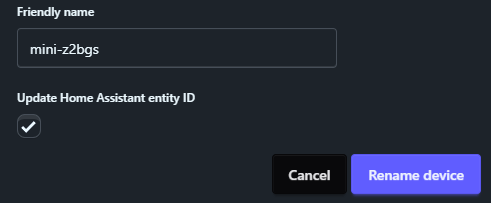
As you can see I also ensured the “Update Home Assistant entity ID” box was ticked.
Job done. No surprises. Now all I have to do is see what the device will do – as I did with the previous device above.
Just to make sure ther would be no surprises when running an old-style compact fluorescent lamp in this neutral-free operation, I removed my original test LED lamp (without turning off the power but with the unit in the OFF state) and screwed in my spare CF lamp (and that’s ALL I use those old lamps for today – never did like the shade of white). Exactly as you’d wish. When I used Z2M to turn the lamp on, it came on, select off and it went off – reliably. I could of course also have shorted S1 for example to one of the other L terminals to turn the lamp on. This device then would work just fine with a normal twin wall switch after rewiring – in which case it is important to know which of the typically 3 wall wires is actually power and which two are going back to lights… in the UK the live wire would typically be the brown wire but in a rural cavehome in Spain it’s not always that easy 🙂
I remember early versions of no-neutral switches like this had an external capacitor and weren’t always 100% reliable but today I’m happy to fit devices like the Mini-Duo-L into my wall.
Note that the pairing button on this device has no dual purpose – it’s just a pairing button.
And that leaves me with the Sonoff Mini-Duo (WiFi) to check out – WiFi and yes, needing a neutral wire.
I wired the device into live and neutral and also my test lamp plugged into live and L1 (spot the deliberate mistake – that lamp return should be neutral not live), I applied power and the blue light on the Sonoff unit flashed 3 times in a row, gap – repeat and continued to do this as I got sidetracked.
I thought I’d be clever and pair the WiFi device as Matter compatible in Google Home instead of (as usual) hooking to the eWeLink app. So, Iw ent to Google Home on my phone and hit the + button to add a matter compatible device. I had the phone scan the MATTER panel on the deivce instruction sheet – and guess what – it worked – “WiFi Smart Plug” and “Wifi Smart plug” were added to my Google home devices (that’s not a typo).
Clicking the devices one at a time in Google Home made the relay’s click – but no lamp lighting up. I checked both L1 and L2 – no difference. Obvious really – as the lamp in this case should return to neutral, not live. Why, oh why do they only give you the one neutral connector. The other L will be for the S1 and S2 switches – but that means I need choc-block… I hate that. Oh well, it’s the first time I’ve ever added a Sonoff device to the network without using eWeLink (except for the old FLASHING method changing the device firmware to run Tasmota as I used to do a lot).
First things first – get some choc-block – then rename the (currently identically-named) outputs. Here we go… correct wiring – no doubt the wrong colours.
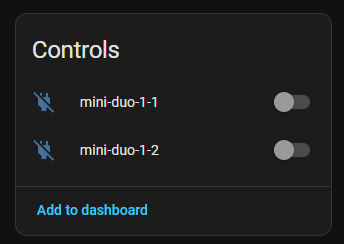
Wired up – working and in Google Home I renamed the 2 outputs to mini-duo-1-1 and mini-duo-1-2.
Now, will they appear in Home Assistant? – that is the question.
Erm, no – there is only one MATTER device in my Home Assistant and that’s not it.
So I went to the Google Home App on my phone – went to the first of the two outputs – settings – linked Matter apps and services – the device was selected and like magic both outputs appeared in Home Assistant. Wheee.
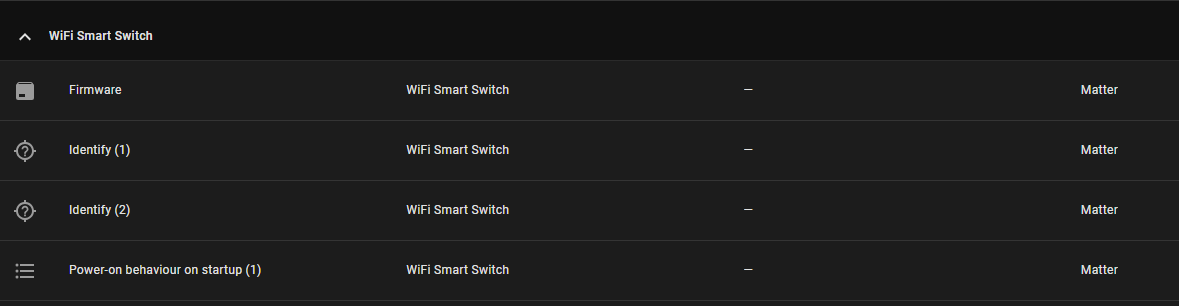
Good but for now it’s still referred to as WiFi Smart Switch in Home Assistant… See below…
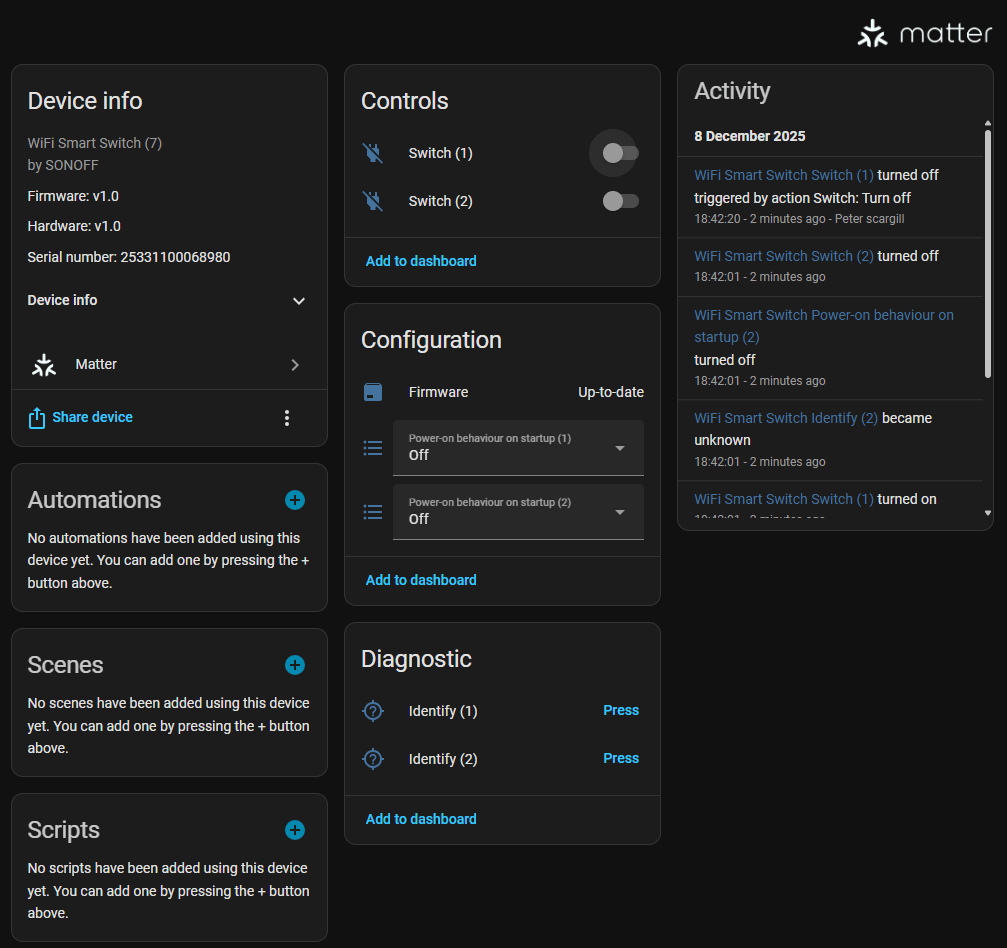
I pressed the two diagnostic IDENTITY buttons in Home Assistant that you see above… Well, that worked but I’m not seeing any name change yet..
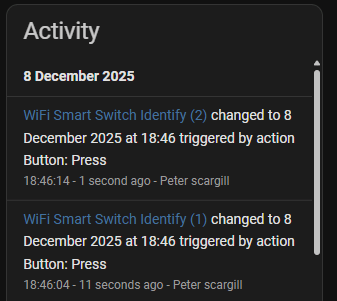
And now I have not one but two devices in Matter in Home Assistant – 7 entities in my new Smart switch – still no sign of renaming..
Ok, so if I go to to devices and look up WiFi smart_switch…. there it is – looks like I can rename the device and hence it’s entities there…
Good job I didn’t make use of the device in Home assistant before doing this.
And there it is – I just renamed the outputs…
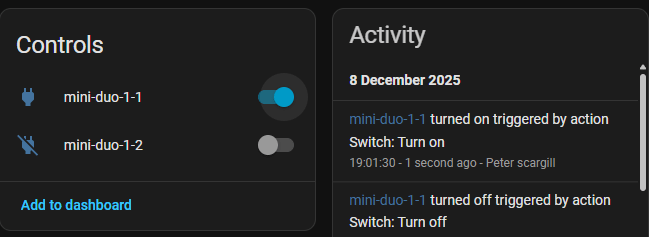
Magic.